Sunday 23 December 2012

TextField in iPhone and How Keypad Go

This is my third tutorial for iPhone UI controls and today we will learn..

how to create a simple Text Field.
when i was started to work on iPhone programming, i got one strange thing that after entering the text in Text field the keypad will not go back and i got stuck.

so i have also write
How to Make the keyboard go away after entering Text?

my development environment is
iOS 5.0 on Mac OS X Lion with Xcode 4.2

Getting Started
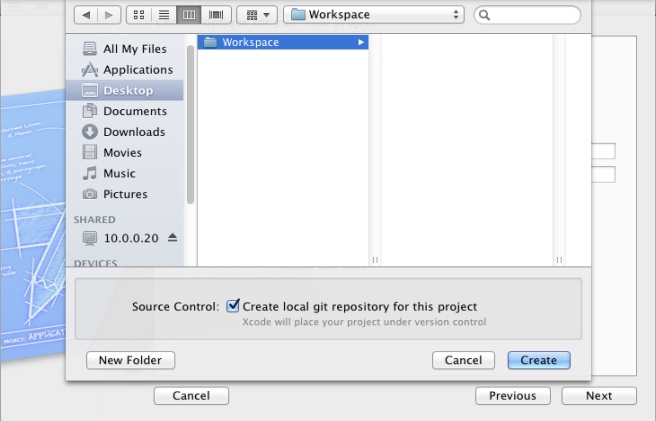
Open up Xcode and create a new project with the iOS\Application\Single View Application template. 


 For the Product Name enter "TextField", for the Device Family choose iPhone and go next..

open header file "TextFieldViewController.h" and modify it like this..

now come to implementation file, open "TextFieldViewController.m" add two methods body at the end of file (remember we have already declared these method in header file)

now modify "viewDidUnload" method and release the ui controls
finally your "TextFieldViewController.m" file will look like this..

okay!! enough code now lets play with UI so just open "TextFieldViewController.xib" file
now drag TextField, Label and Button on View this way..
our phone no Text-Field should have number keypad so change like this
we are almost done! we have written code and drawn UI controls on view.. now we need to connect these so do this
1. connect Text-Field, Label and Button through File owner
  (i) Text-Field
 (ii) Label and do same for Button also

2. connect keyPadGo and showData method through  file owner
 (i) keyPadGo
 select "Did End On Exit" event
 (ii) showData
 select "Touch Up Inside" event


cheers!!
I'd love to hear your thoughts!!

iPhone Button Example


Make sure you have : Installed iPhone sdk with Xcode
while i am using iOS sdk 5.0 with IDE Xcode 4.1
So here we go... start with new project in Xcode
 and select as a "Single View Application" 
Put the some text
Project Name : ButtonView
Package : com.sunil
Device Name : iPhone
we will get this..
so let's begin development..
Click on the xib file then click show/Hide utility tab to show the Utility on Top-right side in Xcode, drag one Label and Button on View then set the name of Button "Click Me" as shown in snap shot
After that click on  show/hide tab to Hide utility

now we need to create an instance of Button and an Action Method for button click action in "ButtonViewViewController.h" file :
to create an instance of Button click on Editor tab add {....} after
@interface ButtonViewViewController{
.......drag here to define outlet (instance) for button......
}
and right click on button then drag from (+) "new referencing outlet option"

we will get this small window so put the name like "btn" and click on Connect..
now do same for Label and put name "lbl" and Connect!!
to create an Action Method for button click drag from (+) "Touch Up Inside" option

we will get this small window so put the name like "btnClicked" and click on Connect..

finally we have code in "ButtonViewViewController.h" file like this..

#import <UIKit/UIKit.h>
@interface ButtonViewViewController : UIViewController{

IBOutlet UIButton *btn;
IBOutlet UILabel *lbl;
}

-( IBAction ) btnClicked: (id) sender;
@end

after this, complete header file ( "ButtonViewViewController.h" file) will look like this..

Now click on the left most button "standard editor" like this..
open "ButtonViewViewController.m" file
you will see that it showing error in "viewDidUnload" method on release
so make it comment... why click here
now scroll down you will get method "btnClicked" here so add some code in this
-( IBAction ) btnClicked: ( id ) sender {
     lbl.text = @"Button has been clicked..";
after this, complete implementation file ( "ButtonViewViewController.m" file) will look like this..

okay that's it!! we have done!! save it (press windows/command button + S)
Now Run Project like this way..
you will get output like this snap shot when you click on button..

Great we have done good job now we should go for some snacks  :)
I'd love to hear your thoughts!!

Hello World in iPhone

So today we are going to create step by step simple Hello World application for iPhone
(simplest program in iPhone ever)

while on my system iOS sdk 5.0 and XCode 4.2 IDE is already installed if you want to look at installation and How to start XCode then check my earlier post here..

okay let's begin..
Go to File Menu >> New >> New Project
or press (Shift+Windows/Command Button+N) on keyboard..
 select "Single View Application"
Now put some text..
Product Name : HelloWorld
Company Identifier (package name) : com.soft
Device Family : iPhone (set)

finally UN-check options 'Use Storyboard' & 'Include Unit Tests' like this..
select the location mine is Desktop (just for this Tutorial) but
Please Don't save your project on Desktop or My Document, just save in Another Hard Drive (Except Operating System installed Hard Drive)
so here is First look of your application..

now i am going to define the Project Structure and brief information about important files..

# Header File (.h)
# Implementation File  (.m)
# XML Interface Builder File (.xib)
# Main File (.m) [it's like main method in C language]

here are these file in our project..


Header File :
Objective-C Header files. Header files contain class, type, function, and constant declarations.
Default look of Header file is like this

Implementation/Source File 
The implementation file contains the actual code for the methods of the class we have defined in header file.
Default look of Implementation file is like this


XML Interface Builder File :
Here we do UI work using all UI Controls/Views like Text, Label, Button, Text-Field and Slider etc
Default look of XIB file is like this

Main.m File :
main.m file is the entry point of the program: It's where the program starts running.


So now we will add Label to show "Hello World" message in our project

1. open XIB file
2. show Utility (Click on Top-Right Tab)
3. show Object Library (on Bottom -Right Panel)
4. Drag UILabel to View..
like i have shown in image ..

set 'Hello World' message on label

now save project (press Windows/Command button+S)..
its time to execute our project do like this image (press Command+R)
The output Screen will be look like this..

ye hip hip hureeee... we did it.. so this is Hello World in iPhone..

if you want to know some advance Control then go here..

I'd love to hear your thoughts!!

Install iOS sdk and XCode IDE on Mac OS X

So you are going to be a iPhone application developer.. Great!! this is the right wall where you get step by step sdk and IDE installation for iPhone/iPod/iPad application development in simple way..

Here i am installing
iOS SDK 5.0 and XCode IDC 4.2

remember this installation will need 10 GB space free on your Hard Disk
so before start installation make sure you have sdk and IDE tool's "DMG" file like this..


now double click this file and you will get
when you start installation the first window will be this so go continue..
Accept the Apple's agreement and go ahead..
so here you can see what are the tools going to install and how much free required on HDD
in Next step go with default destination ,then put User name and Password to continue
now its installing..
Great now we have installed iOS sdk and XCode..

so now you have to go this path to start XCode
on Top Menu Bar click on "Go">> "Computer">> "your hard disk"

then go to here..
/Developer/Applications/Xcode.app
it will look like this
and... Xcode is starting in this way...
Here we going for Hello World Program in iPhone so you should click here..


I'd love to hear your thoughts!!